
For reference, here is the SketchUp model I used to make the parts:
The model is made from 4 Components, and each was exported separately as a COLLADA (.dae) file. Each file was then uploaded to shapeways as is. Once a file has been uploaded and accepted by Shapeways, the file can be ordered in any of the available materials.
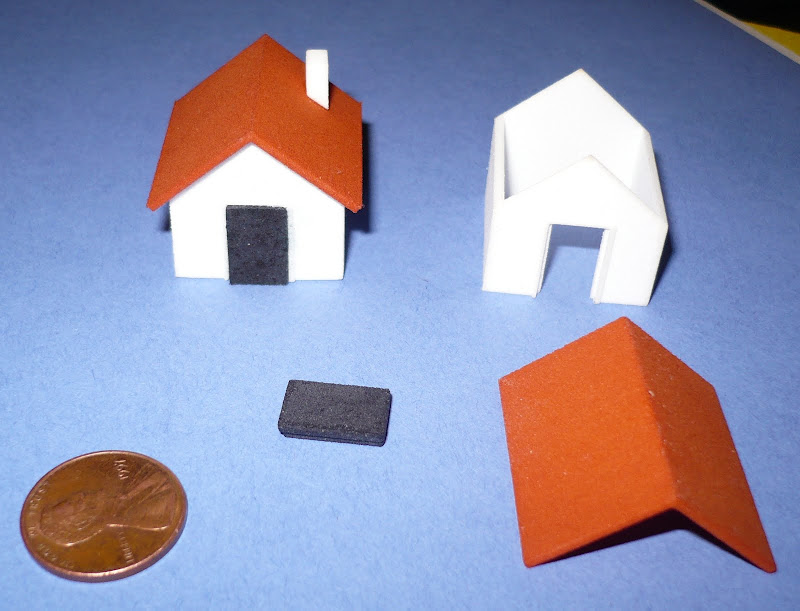
This image shows one assembled model, and the parts for the other. I lost the 2nd chimney! (or possibly the cat ate it.)
I used super glue to assemble the model, but it's not providing a super strong bond. I am guessing the glue is not fusing the plastic, but rather just making a mechanical bond with the rough surface.
Here is a close-up of the assembled house:

Physically, the parts came out very close to the designed dimensions. I expected the machines and the process to be very accurate, and they were. My $99 digital calipers say the parts were all within -0/+0.02mm of the SketchUp model.
In the previous image, you can see the roughness of the material. The material is Nylon 11, and you can read what Shapeways has to say about it here. They accurately refer to it as White, Strong & Flexible, although it is available in other colors.
Along with my model, Shapeways sent a freebie - a 2" long sample of their full-color sandstone material. Here's a washed-out image of the front:

And this is the back side:

"Sandstone" is an appropriate description of the texture of this material. It's similar in feel to a rough sharpening stone, or a fine nail file.
There are trade-offs made in the selection of materials. The full-color material is rougher and brittle (it's made from gypsum.) While the smoother and tougher materials (plastics) are only available in solid colors (typically white, black, or gray.)
For this experiment I used a simple model and started from scratch. Converting a typical detailed SketchUp model will likely require much more work to make it compatible with 3D printing - removing internal faces, overlapping faces, etc.
I have so far been unable to produce an acceptable full-color model directly from SketchUp. A full-color model is likely going to require the use of additional texture-mapping software, and possibly conversion software. (I have had some success exporting as VRML and using Meshlab.)
I'm still a newbie to all this, but I have learned a couple of things to keep in mind when 3D printing is the goal. I'll try to write up some tutorials or examples in the future.


3 comments:
Very cool! Do you have any big plans in mind, now that the process is proven?
Check out CADspan, www.cadspan.com. Free plugin to help you 3d print any SketchUp model.
Nathan - no big plans, just curiosity.
Anonymous - Yes, I plan on looking into CADspan, thanks.
Post a Comment